| ||||||

| ||||||
|
|
How to partition external Hard Drive Disk partitioning is the process of dividing a hard drive into multiple logical storage units known as partitions. Multiple partitions of a disk lets us to defragment and format partitions independent of each other. It also helps to install dual boot operating systems and improves overall computer performance. Go through the following steps to partition an external hard drive in Windows. Connect external hard drive to computer and then open "My Computer" > "Manage" 
Click on "Storage" > "Disk Management" which shows both internal hard drive and connected external hard drive. 
Right click on External hard drive and click "Delete Partition" to create Unallocated disk space. 
Ensure to take backup of your important files and Confirm the deletion of disk partition. 
We should be able to see the Unallocated external hard disk space. 
Create a new partition from the Unallocated external hard disk space as shown below. 
It opens "New Partition" Wizard as shown below, 
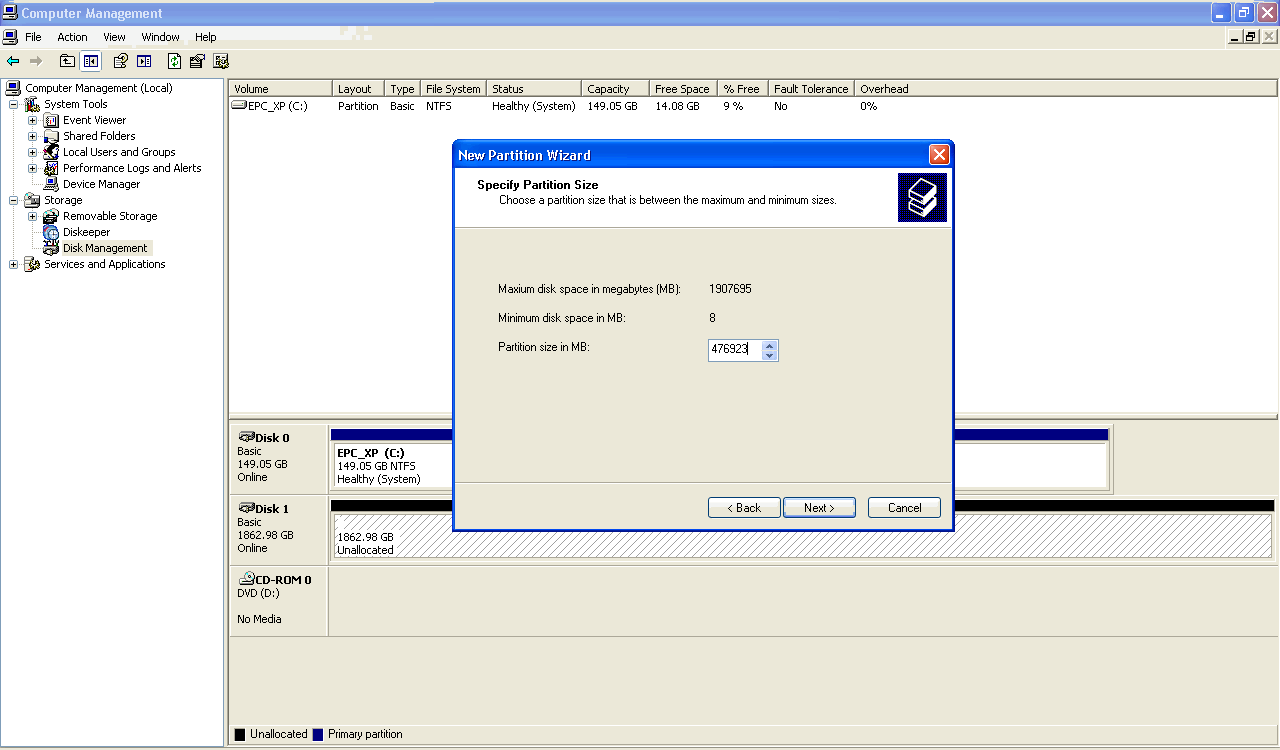
Choose the partition type and allocate partition size in MB. 

Assign drive letter for this partition. 
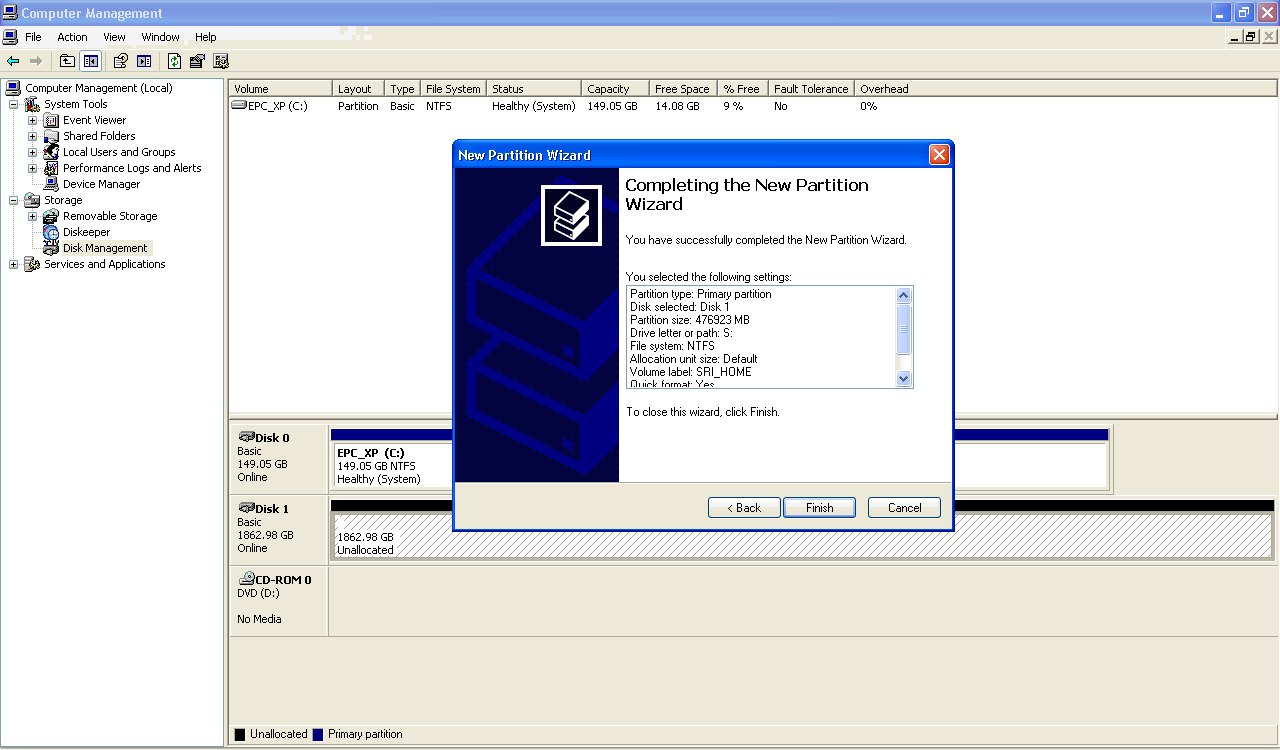
Choose required File System type and volume display name. 
Click on "Finish" to complete the new partition setup. 
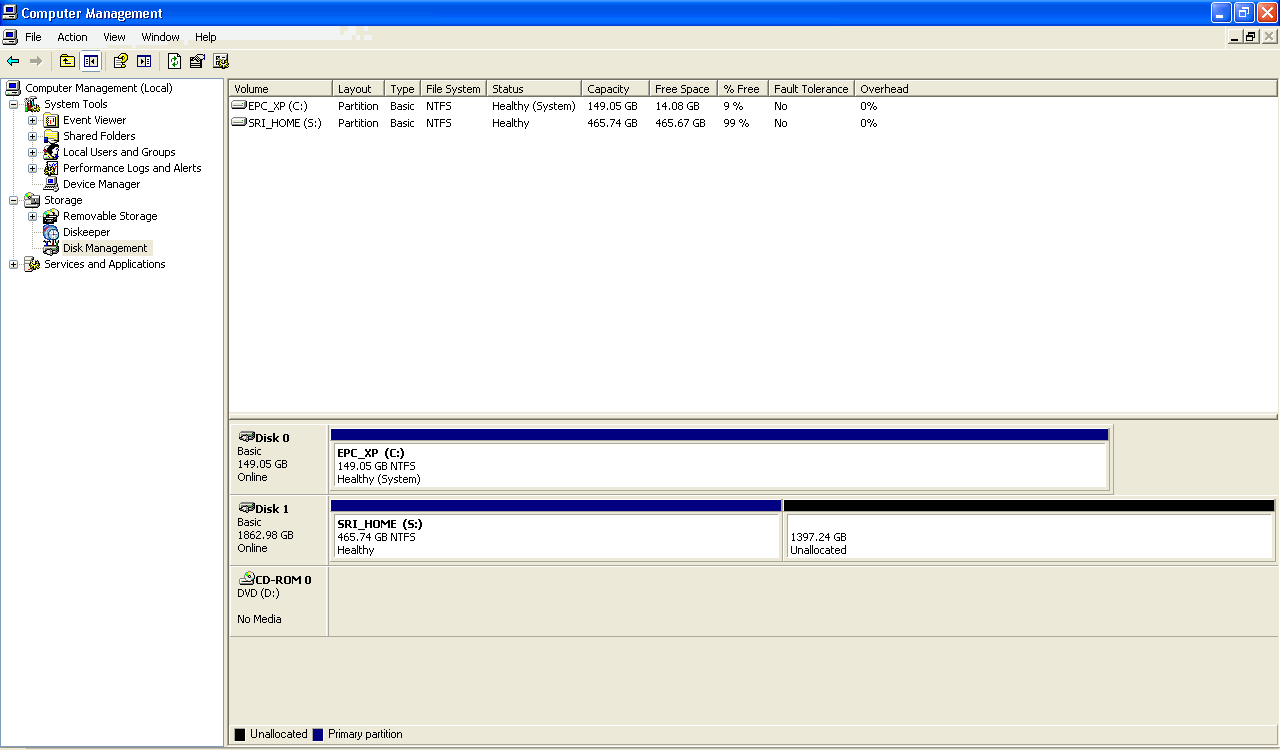
You should see the newly created partition now. 
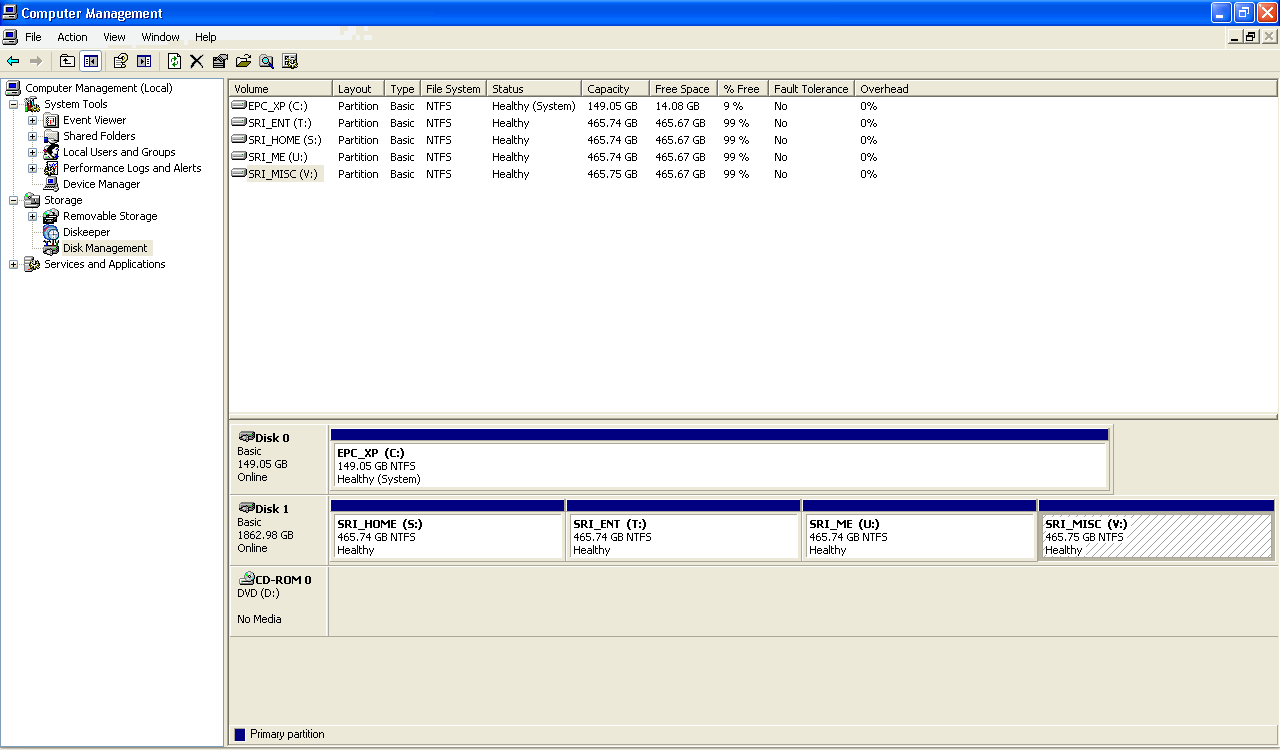
Repeat this procedure to create more disk partitions. 
|
|
||||
|
|
||||||
| ||||||


